A lot of times we need to do various tests and we must use SSL Certificates. Every one of us we have found a way to create a self-signed certificate for test purposes.
Today I would like to explain how can use PowerShell to generate a self-signed certificate and use it in your test environment.
The only requirement is to have PowerShell 4 and newer.
So let's start !!!
How to create a Single Self-Signed Certificate
To create a Single Self-signed certificate you can run the following PowerShell command
New-SelfSignedCertificate -DnsName "localtest.com"

How to create a Wildcard Self-Signed Certificate
Sometimes we want wildcard certificates to include Subject Alternative Names.
New-SelfSignedCertificate -DnsName "localtest.com,test.localtest.com"

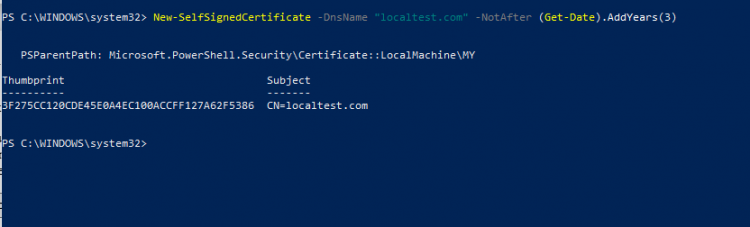
How to add an expiration date to the Self Sign Certificate
Most of the time we don't need an expiration date of the Self Sign certificate but if requested then we can use the following command to set an expiration date.
New-SelfSignedCertificate -DnsName "localtest.com,test.localtest.com" -NotAfter (Get-Date).AddYears(3)
These are some of the most common uses to generate a Self Sign Certificate.
You can use a lot of other commands for different requests like RootCA or Code sign self-signed certs.
Have a nice weekend !!
Sponsor
>

Free Tools for everyone